Crochetnox · Crochet Baby
Easy Crochet Baby Booties Pattern With Fold-Over Cuffs
Make a sage-green pair from the sole up, then use a simple fit check to make the second bootie match the first.
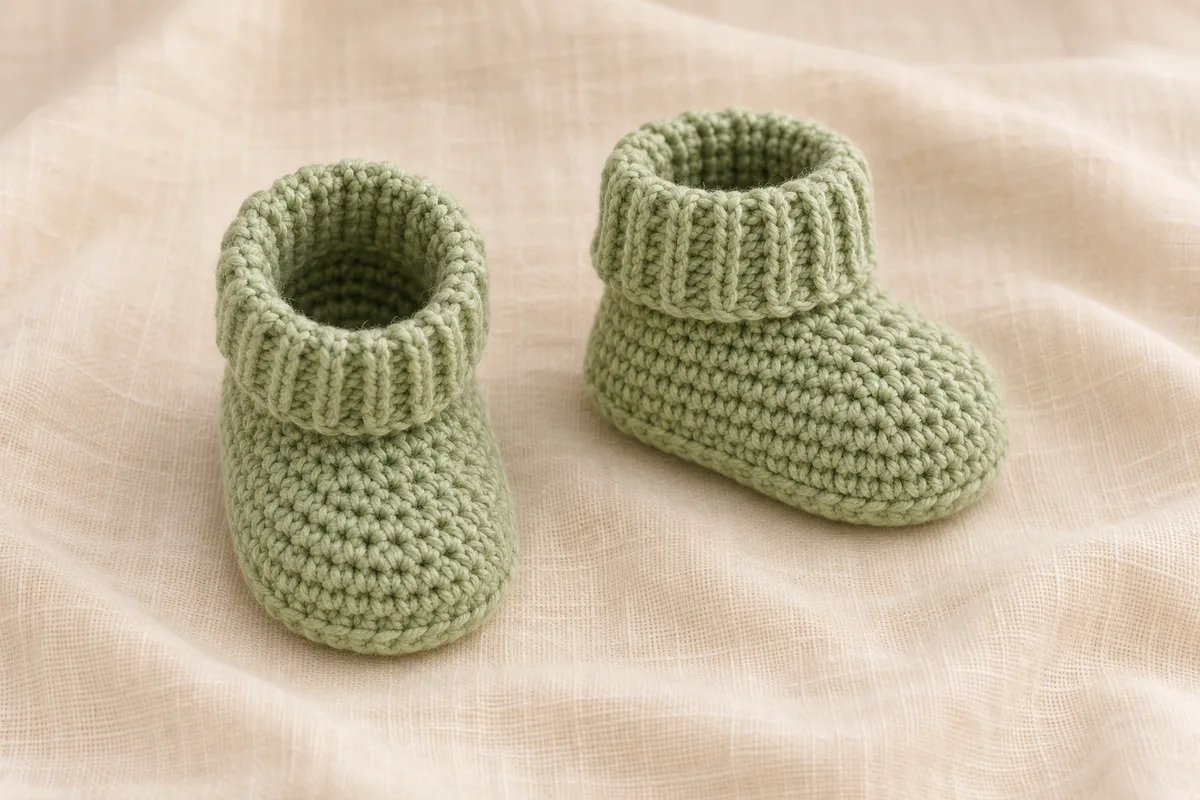
The tricky part of a crochet baby booties pattern is making two booties that fit the same foot. This design gives you checkpoints before you get too far: measure the oval sole, count the stitches after each toe round, and match the cuff height before folding it. You’ll make one bootie from the sole up, then repeat the same instructions for the other.
The fold-over cuff is worked directly into the opening. There are no buttons, ties, or separate embellishments to attach. Sage green makes a lovely everyday pair, but cream, dusty blue, or soft rose will show the shaping just as well. If you’re new to working into a foundation chain, use a smooth, light-colored yarn for your first sample.
Fit note. This is an ungraded pattern draft with stitch counts checked on paper. A physical sample has yet to be tested. Use the measurements below as checkpoints, and confirm the fit of your first bootie before making the pair. Age labels alone won’t tell you how it will fit.
Yarn, hook, and supplies
| Supply | What to choose |
|---|---|
| Yarn | Smooth, washable light-weight yarn (#3), in one color for the first sample. Check the care instructions on the label. |
| Hook | Start with 3.5 mm and adjust after measuring your sole. Choose the hook that makes a flexible, even fabric. |
| Markers | Three removable markers for the round start, toe center, and beginning of the decrease section. |
| Finishing | Tape measure, scissors, and a blunt yarn needle. |
If you substitute yarn, compare the weight symbol first and then look at the fabric it produces. Two yarns with the same number on the label can feel different in the hand. Choose a smooth strand that lets you see the stitch tops, especially when you reach the toe decreases. Craft Yarn Council yarn weight chart.
Measure the foot before you choose a fit
Measure from the back of the heel to the tip of the longest toe. Write down the length in inches or centimeters, then check the width at the widest part of the foot. If you’re making a gift and can’t take measurements, ask the recipient for a foot length or measure the inside of a soft bootie that already fits. A size marked “newborn” can mean different things across patterns.
| Checkpoint | What to record | When to check |
|---|---|---|
| Foot length | Heel to longest toe, in inches or centimeters. | Before you start. |
| Sole length and width | Length from tip to tip and width across the widest part. Lay the sole flat without stretching. | After sole round 3. |
| Opening and toe room | Check that the finished bootie goes on easily and leaves room for the toes. The fold should sit without pressing into the ankle. | Before weaving in the final end. |
| Matching cuff | Count the ribbed rounds and measure the height before and after folding. | Before making bootie two. |
For conversions, multiply inches by 2.54 to get centimeters. For example, 3.5 inches is about 8.9 cm. That’s a conversion example, not a recommended size. The crocheted sole measurement is an early comparison, since the walls and toe shaping affect the space inside. For a small difference, try a nearby hook size and remeasure. If that makes the fabric stiff or floppy, switch yarn or use a graded pattern. Yarnspirations Little Crochet Baby Booties pattern with size options.
US crochet terms and the path through the pattern
ch means chain, sl st means slip stitch, sc means single crochet, and BLO means back loop only, the loop farther from you at the top of the stitch. For sc2tog, draw up a loop in each of the next two stitches, then yarn over and pull through all three loops on the hook. Each decrease turns two stitches into one. Craft Yarn Council US crochet abbreviations.
Work both booties in joined rounds without turning. Start each round with ch 1, work the first stitch into the first stitch of the round, and join with a sl st into the first actual stitch. Neither the ch 1 nor the joining slip stitch counts toward the total. Keep the toe marker separate from the round-start marker.
Free crochet baby booties pattern
1. Crochet the oval sole
Foundation and round 1 (24 sc). Ch 12. Work 3 sc into the second chain from the hook, 1 sc in each of the next 9 chains, and 3 sc into the last chain. Continue on the underside of the foundation. Work 1 sc in each of the 9 chains between the two ends. Join. Mark the middle stitch of the far group of 3 as the toe tip. The other end is the heel.
Round 2 (30 sc). Work 2 sc into each of the 3 stitches at both rounded ends and 1 sc into each of the 9 stitches along both straight sides. Join. Each rounded end now contains 6 stitches. The gap between the third and fourth stitches of the toe group marks the centerline.
Round 3 (36 sc). Across each group of 6 end stitches, work sc, 2 sc, sc, sc, 2 sc, sc, with each instruction worked into one stitch from the previous round. This adds 2 per end. Also place one extra sc in the same stitch as the center stitch on each straight side. Join. The two side increases give 36 total. Keep the toe center between the two halves of the rounded end.
2. Raise the wall and shape the toe
Wall round (36 sc). Sc in BLO all around and join. Working into the back loops leaves a ridge that separates the upper from the sole. Move the toe marker up to the gap directly above the centerline.
Toe round 1 (30 sc). Mark the stitch six stitches before the toe center. Sc up to, but not into, the marked stitch. Work sc2tog six times across the next 12 stitches, then sc to the end and join. The centerline now sits between the third and fourth decrease stitches.
Toe round 2 (26 sc). Sc to four stitches before the toe centerline, work sc2tog four times across the next eight stitches, then sc to the end and join. Keep the centerline between the second and third decreases.
Toe round 3 (24 sc). Sc to two stitches before the centerline, work sc2tog twice across the next four stitches, then sc to the end and join. The bootie should narrow over the toes while the heel remains straight.
3. Make the fold-over cuff
Cuff base. Work one round of 24 sc through both loops. Try the opening on your sample fit before adding height. If it feels too tight, revise the toe shaping or switch to a pattern with a larger opening before making the second bootie.
Cuff texture. Work six to eight rounds of sc in BLO, keeping 24 stitches in each round. These rounds create horizontal ridges. Check the height with the top half folded down. The folded edge should sit above the shaped toe, with room for the opening to flex. Fasten off, weave in the ends, and fold the cuff outward.
If you want a contrast cuff, change color on the last pull-through of the slip stitch before the cuff base. Keep the color change at the round join, then tuck both tails into the fabric. For your first pair, one color makes it easier to compare the two sides and spot changes in tension.
Match the second bootie to the first
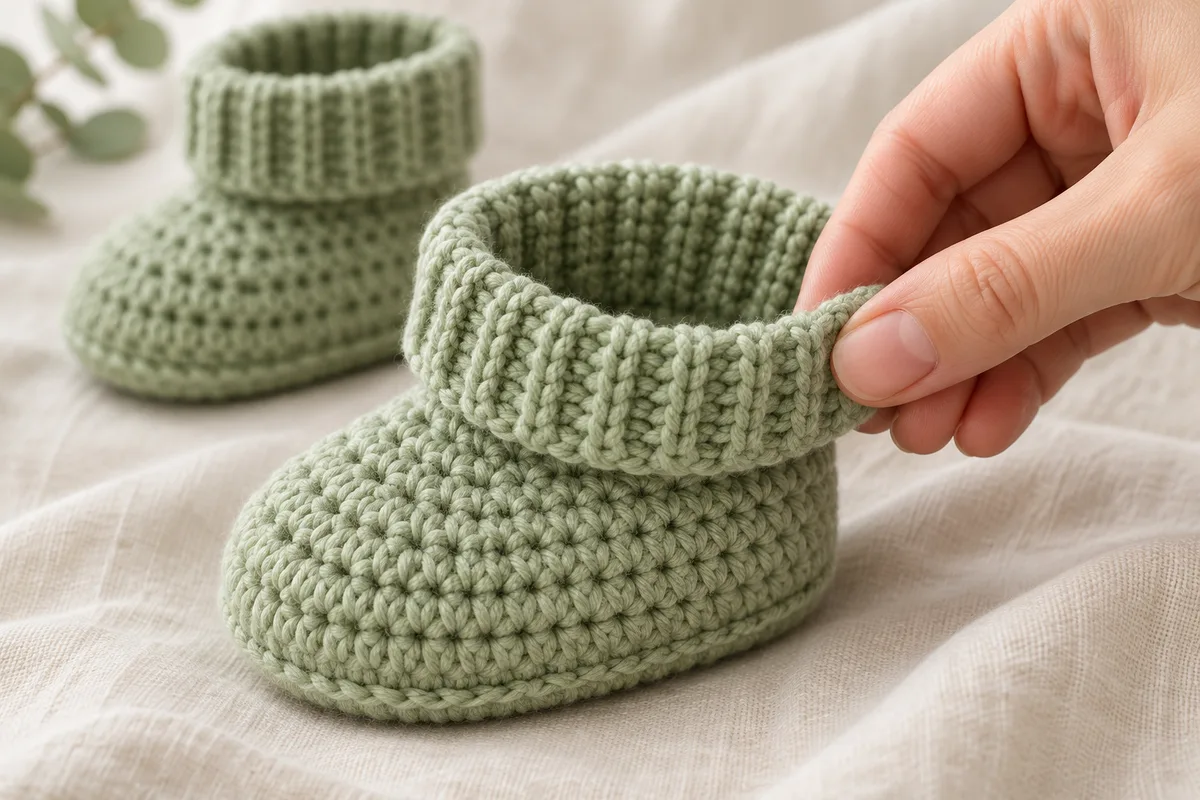
Set the first sole beside the second after round 3. Compare the toe and heel alignment before you add the upper. If one sole is longer even though the counts match, compare the tension of the foundation chains. It’s easier to redo a sole at this point than to correct a finished bootie. Use the same yarn and hook, and start the second cuff with the same number of stitches and rounds.
Keep a round record for the pair
Write your hook size, yarn, and sole measurements on the same sheet as your round counts. If you put the project down, note the last completed round before you remove the hook and secure the loop with a marker. That small note is especially useful at the toe, where the three decrease rounds look similar once you have worked past them.
| Stage | Stitches at the end | What changes |
|---|---|---|
| Sole rounds 1–3 | 24 → 30 → 36 | Increases widen the oval. |
| Wall | 36 | Back loops define the sole edge. |
| Toe rounds 1–3 | 30 → 26 → 24 | Decrease across the toe only. |
| Cuff | 24 per round | Keep the count steady and match the height. |
When comparing your pair, set both booties on the same flat surface and point the toes in the same direction. Align the back edges first. Compare the fold depth next, then check whether one cuff stretches more easily than the other. If the difference is in the final round, rework that round with relaxed tension before trying to adjust the entire cuff.
Troubleshooting the shape
| What you see | What to check |
|---|---|
| A twisted sole | Make sure the foundation lies flat before joining and that you used both sides of the same chain. |
| A toe leaning to one side | Count out from the toe center before each decrease round. The decrease groups should straddle that line evenly. |
| A cuff getting narrower | Look for a missed first stitch or an accidental decrease at the join. Recount to 24 before moving on. |
| A stiff fold | Check that you worked through the back loops on the cuff rounds. If the fabric is still too firm, try the cuff on a sample with a slightly looser tension. |
Frequently asked questions
Can I use worsted-weight yarn?
You can make a sample with it, but expect a different size and fabric. Measure the sole first and check that the upper folds comfortably. Use a pattern designed for that yarn if the sample is too large.
Do I need separate left and right instructions?
No. The sole and toe shaping are centered. Work the same rounds twice and place the cuff fold at the same height on both.
Can I make the cuff shorter?
Yes. Stop after fewer cuff rounds for a shorter fold, or leave the cuff unfolded. Record your round count so you can repeat it on the second bootie.